IRON NEST: Heavy Turret Simulator Demo Operations —All Six Missions
Campaign order, what each operation teaches, and when to move on.
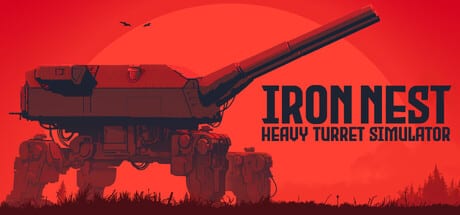
The free IRON NEST Steam demo (app 4300500) is not a single tutorial mission — it runs six operations that teach the full gunnery toolkit before the August 6, 2026 full release. Four sequential tutorials introduce new systems; Chill offers relaxed sandbox practice; Challenge: FDC is the timed score attack once counter-battery pressure makes sense.
This walkthrough lists every demo operation in recommended campaign order, what each one adds to your skill set, and which wiki guides to read when a step feels opaque. For download links and storage notes, start with the Demo Guide.
How to use this guide
Play operations 1 through 4 in order. They share the same core loop — read orders, plot targets, pick charge, fire — but each layers a mechanic the next mission assumes you know. Chill is optional practice after the tutorials. Challenge: FDC is the finale when you want leaderboard-style pressure.
If operation one still feels confusing, pause and run the First Firing Solution checklist side by side with the mission.
Operation 1 — Calibration Fire (tutorial)
Teaches: Grid-to-coordinate mapping, traverse and elevation, powder charge selection, and high-explosive calibration without spotter triangulation in the way.
High Command designates a calibration grid and expects HE on target to confirm the nest is combat-ready. You plot from your turret cell to the target intersection, read bearing and range from the measure tool, set charges on the ballistic calculator, load HE, lay the gun, and fire.
Wiki links: Map Measurement, Ballistic Calculator, Shell Loading & Gun Laying.
Tip: Recalibrate the teleprinter if ribbon text looks garbled — see Teleprinter & Intel.
Operation 2 — Fire & Light (tutorial)
Teaches: Spotter triangulation, multi-phase missions, star shell ceremonial fires, and recon-photo corrections.
Intelligence identifies anti-monarchist elements in a city sector while High Command schedules a starburst illumination over the royal palace — a non-combat star-shell operation separate from the HE phase. You triangulate infantry from spotter bearings, destroy hostile tokens, then switch to star shells only for the palace illumination.
The in-game briefing does not fully spell out phase two; expect a teleprinter order change after the combat segment completes.
Wiki links: Triangulation & Spotting, Artillery Corrections, Smoke & Star Shells.
Operation 3 — Liberation (tutorial)
Teaches: Turret repositioning, urban infantry targets, requisition procurement, recon flight requests, and left/right gun awareness under combat orders.
High Command repositions the nest to support clearing a city sector. Five hostile infantry units must fall within the designated urban grid. The requisition console authorizes ammunition and powder resupply at your discretion — see Requisition System for how procurement fits the loop.
Recon flights over priority grids (for example ammunition caches across the river) appear in later segments and foreshadow precision AP work in the full campaign.
Wiki links: Requisition System, High Explosive Shells, Physical Gun Controls.
Operation 4 — Counter-battery (tutorial)
Teaches: Active counter-battery timers, triangulating hidden enemy artillery, pre-marking multiple batteries, and destroying guns before they bracket your nest.
Enemy forces deploy artillery across the river in response to recent operations. High Command anticipated this — your first shell starts the counter-battery clock. Mark all hostile artillery positions before firing when possible; community guides note the timer begins at first impact, not first order read.
Use cross-bearing plots from forward observers, AP or HE per emplacement type, and fast correction loops from Artillery Corrections.
Wiki links: Triangulation & Spotting, Armor Piercing Shells.
Operation 5 — Chill (sandbox)
Teaches: Nothing new — relaxed free-fire on Cartagena with no counter-battery clock, mixed soft and armored targets, and underground caches that need AP.
Use Chill to experiment with shell mixes, requisition pacing, and map cleanup habits without mission timers. It is the best sandbox for drilling measure-calculate-load muscle memory before Challenge: FDC.
Wiki links: Ballistic Calculator, Shell Tier List.
Operation 6 — Challenge: FDC (score attack)
Teaches: Timed scoring under counter-battery pressure, AP bunker destruction, and FDC pause resource management.
Three enemy columns converge on a river crossing while underground Fire Direction Centers coordinate hostile ranging. Counter-battery begins after your first shell lands. Destroy FDC bunkers with AP rounds to suspend enemy coordination temporarily — but only three exist, so spend pauses wisely.
Full tactics live on the Challenge Modes guide.
Operation summary table
| # | Name | Type | New mechanic |
|---|---|---|---|
| 1 | Calibration Fire | Tutorial | Basic grid fire, HE calibration |
| 2 | Fire & Light | Tutorial | Triangulation, star shells, phases |
| 3 | Liberation | Tutorial | Reposition, requisition, urban infantry |
| 4 | Counter-battery | Tutorial | Timer, hidden artillery duel |
| 5 | Chill | Sandbox | Free practice, mixed targets |
| 6 | Challenge: FDC | Challenge | Timed score, FDC pauses, AP bunkers |
After the sixth operation
Demo progress typically does not carry into the purchased full game unless developers announce save transfer. Treat these six operations as skill certification — if Challenge: FDC feels fair, the 15-region campaign at launch will feel like a natural extension rather than a genre shock.
Wishlist app 2950790 on Steam for the August 6, 2026 unlock, or read platforms if you plan to buy on GOG or Epic. Return to the Guides Hub for deep dives on any instrument that still slows you down.
Frequently Asked Questions
Quick answers to the most common questions.
How many missions are in the IRON NEST demo?
Six operations: four tutorials (Calibration Fire through Counter-battery), Chill sandbox, and Challenge: FDC timed score attack.
What order should I play demo operations?
Play operations 1–4 sequentially, then Chill for optional practice, then Challenge: FDC when counter-battery mechanics feel familiar.
Does the demo include counter-battery missions?
Yes. Operation four is a dedicated counter-battery tutorial, and Challenge: FDC stacks the same pressure with FDC bunker pauses.
What is Chill mode in the demo?
A relaxed Cartagena sandbox with mixed targets and no counter-battery timer — ideal for practicing shell choice and map workflow.
When does the requisition console appear?
During Liberation and later operations. It authorizes ammunition and powder resupply mid-mission — see the requisition system page.
Is Challenge: FDC the same as full-game challenge modes?
It previews the design — timed pressure, AP bunkers, leaderboards — while the full release adds eight challenge modes per the Steam listing.