IRON NEST: Heavy Turret Simulator Guides & Walkthroughs
From your first firing solution to counter-battery spotting —every procedure explained.
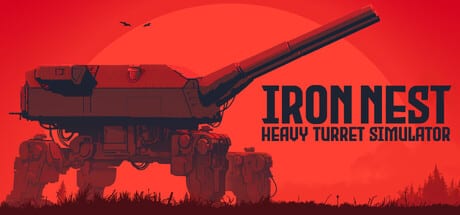
IRON NEST: Heavy Turret Simulator is not a reflex shooter. You sit inside a colossal dieselpunk war machine and turn intelligence into impact —one deliberate shot at a time. These guides cover every step of that loop so you can operate the teleprinter, tactical map, ballistic calculator, and manual gun controls with confidence.
If you have never fired a round, start with the First Firing Solution walkthrough. It walks through one complete mission from teleprinter order to aerial recon confirmation. Players who want to try before buying should read the Demo Guide next —the free Steam demo teaches the same core loop in a compact training ground.
Core systems
Every accurate shot in IRON NEST follows the same chain. Intelligence arrives first, measurement second, ballistics third, and manual gun work last.
- Teleprinter & Intel —Calibrate the teleprinter, monitor radio traffic, and decode High Command orders plus spotter reports before you touch the map.
- Map Measurement —Use the tactical grid, colored pencils, and measure tool to extract bearing and range. Sloppy map work wastes shells no matter how good your math is.
- Ballistic Calculator —Feed range into the calculator, select powder charges, and read the elevation solution on your firing card.
- Shell Loading & Gun Laying —Chamber the right round, set propellant bags, and traverse or elevate the 5,000-ton turret to match your solution.
After the first hit
Landing one shell is satisfying; staying accurate under pressure is the real skill. These guides cover the advanced loop that separates new operators from veterans.
- Artillery Corrections —Read recon photos, illuminate targets with star shells, and walk rounds onto the aim point when the first shot falls short or long.
- Triangulation & Spotting —Plot cross-sections from spotter reports, locate enemy batteries, and win the counter-battery duel before their guns range you.
- Clipboard & Firing Card —Tab discipline, firing card fields, and a repeatable pre-fire checklist.
Recommended learning order
New players benefit from a fixed sequence. Run the Demo Guide practice loop slowly, then follow the First Firing Solution step by step. Once measuring and calculating feel automatic, deep-dive the Ballistic Calculator and Map Measurement guides in either order. Save Artillery Corrections and Triangulation & Spotting for when you can complete a basic fire mission without pausing.
What each guide covers
| Guide | Best for |
|---|---|
| First Firing Solution | Complete beginner walkthrough of one full shot |
| Demo Guide | Free Steam demo download and efficient practice |
| Ballistic Calculator | Range, bearing, powder charges, and elevation |
| Map Measurement | Grid reading, pencils, measure tool, clipboard values |
| Teleprinter & Intel | Calibration, radio channels, intel report types |
| Shell Loading & Gun Laying | Ammunition rack, traverse, and elevation controls |
| Artillery Corrections | Star shells, walking rounds, reading recon photos |
| Triangulation & Spotting | Cross-section plotting and counter-battery spotting |
| Clipboard & Firing Card | Tab workflow, firing card fields, and pre-fire checklist |
Tips for using this hub
Trust the procedure over guesswork. IRON NEST rewards operators who measure twice and fire once. When a guide mentions a value copied to your clipboard from the map tool, use that exact number in the ballistic calculator —rounding early creates misses that look like bad luck but are really bad math.
Cross-link between guides as you learn. The First Firing Solution touches every system briefly; the dedicated pages go deep on each instrument. Return here whenever you forget which guide covers a specific step —every path on this wiki uses trailing slashes and works across all supported languages after generate.
Frequently Asked Questions
Quick answers to the most common questions.
Which IRON NEST guide should I read first?
Start with the First Firing Solution walkthrough if you own or plan to buy the full game. If you only have the free demo, read the Demo Guide first, then follow the same walkthrough inside the demo missions.
Do I need to read every guide before playing?
No. The First Firing Solution covers the full loop in one sitting. Use the other guides when you want deeper detail on a specific system like the ballistic calculator or map measurement tools.
Are these guides accurate for the Steam demo?
Yes. The demo uses the same teleprinter, map table, ballistic calculator, and manual turret controls as the full release. Demo missions are shorter but the procedure is identical.
How do corrections and spotting guides fit in?
Read Artillery Corrections after you can fire a basic mission. Triangulation and Spotting matters most when missions ask you to locate enemy batteries or respond to counter-battery fire.
Will new guides appear here at launch?
This hub links to every current guide JSON under content/source/guides/. When new topics are added, they will be linked from this page body and surfaced on the home page if marked featured.